Gowanus Furniture Co.

I shipped out two boards last Friday, then spent the weekend in the woods (both of which felt really good).

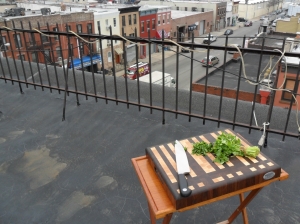
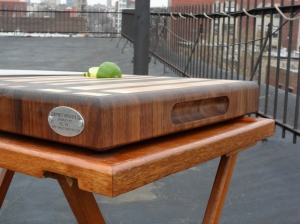
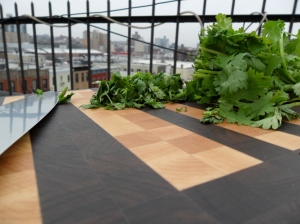
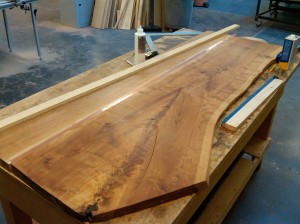
Here are the latest.  They're about 15" x 19", and each weigh 14lbs (nearly broke that table...). The board to the left  is "SDS".

Each board is tagged and numbered (surely in the future those with lower numbers will fetch higher prices at auction, should you ever choose to sell and cash in).

These are finished with my own blend of mineral oil, beeswax, and orange oil, (with a final thin coat of beeswax on top) and I love how the finish came out. It's so smooth.

$100 off orders placed before May 1 - get yours now for $250. The last board you (or the person you give it to) will ever need.

Start a conversation and bring people together.

]]>

Oh right, furniture and making stuff.

That's what this blog is supposed to be about.  Right.  Yes.  Yes.

So the hybrid pot rack / shelving experiment is finally done.  Saw this article, and got me thinking.  This piece is the result.  Will post more about that in a bit.

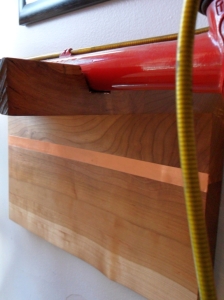
Uprights are solid 5/4" walnut, shelves and frame on the back are 1" walnut ply covered with solid walnut veneer on the edges.  Rods are aluminum conduit brushed to a matte finish.  All of the conduit pieces are held in place with set screws making it quite secure.

The shelves rest on the conduit with a channel on the underside about 1/4" deep, and are held in place with wooden pegs at the rear of the frame so that the shelves cantilever out.

I think the pegs remind me a little of Mackintosh - I really like that.

The whole system is affixed to the wall with a a cleat.  I need to add more hooks to the underside of the shelves to hold more pots.

What do you think?

I also may have also overstaged the photos slightly, but had to be a quick shoot.

This was designed to fit my friend Justin's space.  Would like to build an entire bookshelf system with identically sized shelves covering an entire wall.  There shelf spaces would be taller  and a bit deeper to be more effective for books.
If any interest in a good deal on a protype, do get in touch.

]]>

Right now I have a couple projects in the hopper. Some to finish, and some that are new. Plan to have all completed early in the New Year.

Low Credenza

Just about all set, but still need to build the (pricey) copper frame and a few more modifications to the slab. I need to drill a half circle through it on the back so that cords can pass up to the TV and the slab be flush against the wall, and add the butterfly to prevent the crack from growing. I also need to rout some shallow grooves to hold a cushion in place when I use it for seating (i.e. party time), as well as fabricate something to put in those grooves when no cushion (i.e. book time). To go with that, I'll mount a cushion on the wall. Once I have the frame, I'll also drill some very shallow holes to keep it in place and not sliding around and accommodate the 4 rubber stops that will support it.

Here's the latest of it in situ.  On its paint can frame.  With the copper frame, the surface will be about about 3" higher, the boxes will remain at approximately the same height.  The radio below TV will also go and clean up the look a bit once some other audio projects are finished.
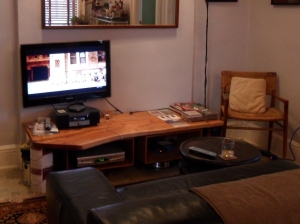
Low Credenza with Paint Can Frame

I designed the cherry boxes below to be able to accommodate rack-mount sized components.  Why, at this p0int, I'm really not sure, because,  as you can see, I don't have any.  But you can imagine in the future those will be chock full of blinking lights.

Bike Rack


Done.  Take a look:
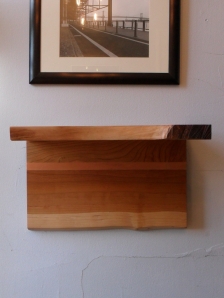
I used Plasti Dip (the rubber material on things like pliers) to line the channel rather than using bicycle inner tube. (Note from the fourth picture that the top tube isn't resting on the copper,  only the rubber.) Inner tube was a clever idea, and would have been a great way to re-purpose materials, but too tough to get something that was never intended to be a flat surface to behave as a flat surface. I was thinking I could build some sort of jig to keep it under tension while gluing, then release it and trim the excess, but just too complicated for the time being.

I have it currently tanning perched on my windowsill. A friend of mine saw it as he was driving up 3rd Avenue. Thought it a bit odd.  Been just a few sessions, and it still looks a little blah, but even with just a few hours the color is getting a deeper. Still considering some sort of hooks to hold helmets and such, but reconsidering and think they may be a bit impractical if the bike rack is hung at a low height (e.g. waist level).

Shelving System

This moving along.  I was able to get the walnut plywood delivered to the shop on Monday. Free delivery is great, but only if they're in the area. Thankfully it all worked out and was  far superior to me carrying a 4' x 8' sheet of 1" thick plywood down 3rd ave from my apartment. Ugh.

This particular piece is going to be for a kitchen and a combination of a pot rack and shelving system.  The following picture gives the gist of how the shelves will work.  Just think thicker walnut plywood and imagine a shallow channel in the underside of the plywood that fits over the pipe and keeps the shelf in place.
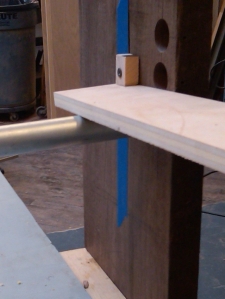
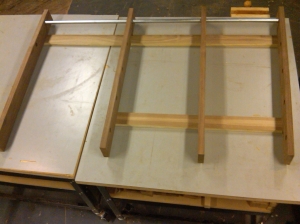
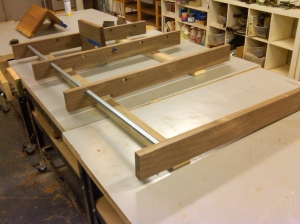
Here are some more shots of the current project.  The bottom two thirds of the vertical piece on the left will eventually be removed.  There will be two pipes spanning the entire width, and an additional three on the right side for a total of five.
Cutting Boards

I've been looking to make some very substantial end-grain cutting boards for a while now. I'm want to monogram the cutting boards with initials in a sort of Morse code "barcode". Dots will be a stripe 1x wide, a dash is 2x wide. New but timeless.  Personalized for you.  Walnut and maple.  This boards will also be thick - 2".

There's are lots of really cool end grain boards out there. I like them quite a bit, but want something more substantial.

I also intend to do custom boards that will fit over your sink! Wow!  Here are the plans for the two I'm working on now.

This is one for a friend:

This will be one for me.
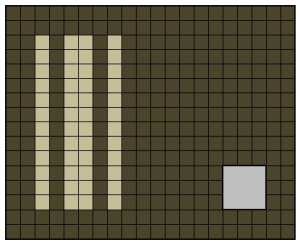
The stripes say "R" (I might move them right a bit, not sure yet) and that little square on the bottom left is a 3" x 3" hole under which one of those Wonton soup containers will fit just right. I can then chop my onions and the skins go into the hole and into the container. My kitchen has - no joke - 2.22 square feet of counter space. This cutting board over my sink would increase my counter space by 100%.

Both of these will be close to 16" x 20", and about 2" thick. Heavy. No joke. But the last one you'll ever need. And the surface will be soooooo smooth.

What do you think?]]>

The two boxes are done, and the slab was glued, so now had to put finish on it.

Finishing the two boxes was quick - a light sanding and a coat of Danish oil. Finishing the slab took a bit longer.

After removing the bark from the front and finishing that edge, I finished the top with an orbital sander, and finished it with a coat of Danish oil. In hindsight, I could have sanded less, applied the oil, then sanded the wet surface to save some time, but do like how very very smooth it is. Once I put on the oil, it really looked amazing.

I wanted the surface to be as smooth as possible and finished so that the grain would be something you could just stare at for hours.

There's a seam where the lumber is glued to the slab. The two pieces are matched up pretty well, but it's still quite noticeable, so I wanted to inlay a thin band of copper along the seam and thought that would look really cool.

I routed a very thin groove into the piece, then did a bit of filing to make sure the copper fit perfectly. I bought a sheet of copper from Veneer Supplies and the adhesive. I wish I could get the copper in a roll - cutting identical strips to run the length of the board was much harder than I thought. The copper adhesive has worked well so far, but I should have planned the clamping better. Parts of it have a bit of a tacked-on-with-a-hot-glue-gun sort of look. Gross. Well, maybe not that bad, but it could certainly look better.

It's currently in my apartment (resting on paint cans until I finish the copper frame) with the boxes below, and is looks just as I planned. I noticed a crack extending from the narrow end of the slab - I need to add a butterfly to stop that from spreading. The final step will be rout a thin grove in the narrow end that will keep a removable cushion in place (cushion for seating for parties, books when just me), as well as cutting a small notch in the back edge on the wide end to allow cables to pass from the TV above to the DVD player below, etc.

Stay tuned for part III and more pics...]]>

A current project is a low table of sorts to hold cable boxes, DVD players, audio equipment, etc.  This is about the first part of the project.

The table is made of a cherry slab floating on a copper frame, with boxes suspended below to hold the components.  One side will serve as a place for books or a seating area, depending on the situation. Love cherry & copper together.

First thing was to get a big slab of wood.

After a little research, found Willard Brothers down in Trenton, and after a few emails, headed down on the train.  That place is amazing. Any sort of exotic wood you need - they got it, acres of it. My plan was to find the right piece and bring it back on the train. I did. But was a bit ridiculous. Subway turnstiles were tricky.

Next I needed some cherry veneer plywood to make the boxes and a piece of cherry lumber to extend the width of the slab to 20" or so.  Thankfully Rosenzweig's delivers.

The boxes are simple - pieces of the plywood glued up with biscuits, with some pieces of cherry attached to front and sanded flush. There are small openings at the base in the back for cords to pass through, and it is open at the top rear for cords to go up to the TV (and those openings aren't visible when viewed from the front).

Here is what will be the eventual design - just replace the Ikea stools with a frame made of 2" copper pipe. None of the wood is finished (note the bark is still on the slab and the boxes look pretty light). The large gap in the back of the boxes has since been filled in.

Next, to make the slab a bit wider, I ripped the live edge off the back of the slab, and an edge off of the lumber, and glued them both together, trying to match the grain.

Here it is - drying glue!  Neat-o.

Part II will be finishing the surface of the slab and inlaying some copper along the seam the length of the slab... ]]>

Categories

Recent News